Post by Smangii on Apr 26, 2006 4:56:59 GMT -5
Pretty easy tutorial, but I found it as a nice effect that I use often, so I'd thought I'd share it ^^
WELCOME to the tutorial on how to make a scattered color effect! First off, this tutorial was made in PSP X, but I'm sure it's capable with 9, 8, and 7...possibly earlier. Only layers, coloring, and erasing involved.
STEP 1: Open your image I'm going to use this image:
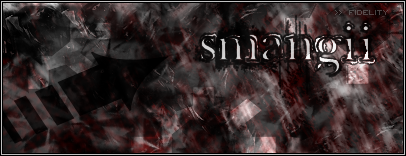
But, I'm going to erase the color by going to Adjust --> Hue and Saturation --> Hue/Saturation/Lightness and setting the saturation bar to -100 (or lowering it all the way down) Now my image is grayscaled...

STEP 2: Go to layers --> New raster layer --> OK
STEP 3: In the Materials Palette, click on your foreground color and set it to: ff8080
STEP 4: Press the "F" key on your keybaord, or click the Flood Fill tool on your tool bar (the paint bucket).
Fill the new raster layer. Your entire image should be the pink/salmon color.
STEP 5: press the "X" key on your keyboard. This should open the eraser tool. In the eraser toolbar, select your brush type. I'm going to use this Tank Drawings set that can be downloaded HERE. Or, if you don't know the whole downloading process you can use the Marble2 brush in PSP X or some other type of grunge-like brush.
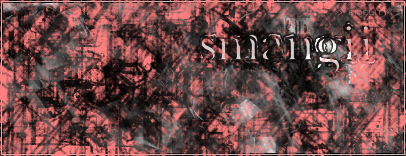
STEP 6: Begin to erase your image, with SINGLE CLICKS. Do NOT drag your cursor around, and do not erease the entire thing! Here is what your erased image should look like:
STEP 7: With the layers palette opened, double click on your pink-colored raster. (the new one)
STEP 8: A "Layer Properties" Window should open up. Click the drop-down arrow under "Blend Mode" and choose "Color" Like so:

Click OK.
STEP 9: Ta da! That's the easy blood splattered effect ^^ Here's what mine looked like:
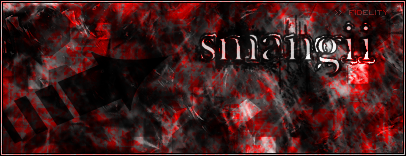
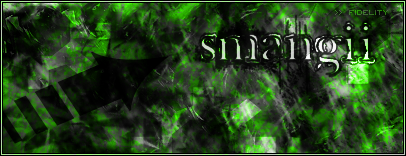
Now, if you would like it another color, go to Adjust --> Hue and Saturation --> Hue/Saturation/Lightness. Set your Saturation to 0, and your lightness to 0. For the Hue, drag the cursor up and down the bar to select a color you like. Here are a few that I made:
HUE AT 105:
HUE AT 180:
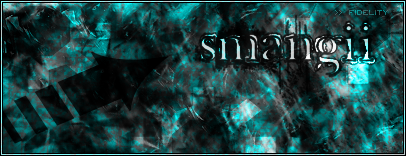
HUE AT 36:
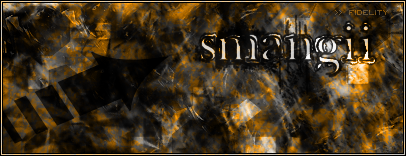
Hope you enjoyed! ;D
WELCOME to the tutorial on how to make a scattered color effect! First off, this tutorial was made in PSP X, but I'm sure it's capable with 9, 8, and 7...possibly earlier. Only layers, coloring, and erasing involved.
STEP 1: Open your image I'm going to use this image:

But, I'm going to erase the color by going to Adjust --> Hue and Saturation --> Hue/Saturation/Lightness and setting the saturation bar to -100 (or lowering it all the way down) Now my image is grayscaled...

STEP 2: Go to layers --> New raster layer --> OK
STEP 3: In the Materials Palette, click on your foreground color and set it to: ff8080
STEP 4: Press the "F" key on your keybaord, or click the Flood Fill tool on your tool bar (the paint bucket).
Fill the new raster layer. Your entire image should be the pink/salmon color.
STEP 5: press the "X" key on your keyboard. This should open the eraser tool. In the eraser toolbar, select your brush type. I'm going to use this Tank Drawings set that can be downloaded HERE. Or, if you don't know the whole downloading process you can use the Marble2 brush in PSP X or some other type of grunge-like brush.
STEP 6: Begin to erase your image, with SINGLE CLICKS. Do NOT drag your cursor around, and do not erease the entire thing! Here is what your erased image should look like:

STEP 7: With the layers palette opened, double click on your pink-colored raster. (the new one)
STEP 8: A "Layer Properties" Window should open up. Click the drop-down arrow under "Blend Mode" and choose "Color" Like so:

Click OK.
STEP 9: Ta da! That's the easy blood splattered effect ^^ Here's what mine looked like:

Now, if you would like it another color, go to Adjust --> Hue and Saturation --> Hue/Saturation/Lightness. Set your Saturation to 0, and your lightness to 0. For the Hue, drag the cursor up and down the bar to select a color you like. Here are a few that I made:
HUE AT 105:

HUE AT 180:

HUE AT 36:

Hope you enjoyed! ;D


